Unseen and Unappreciated

Our family was all about scouting—with Ed IV in Tiger Scouts, Cub Scouts, and then Boy Scouts, Ed was the Cubmaster for several years, Ellis was in Girl Scouts, and I was a Tiger Scout Coordinator one year, and a co-leader for the Girl Scout Troop for several years.
“Scout”
should have been our middle name!
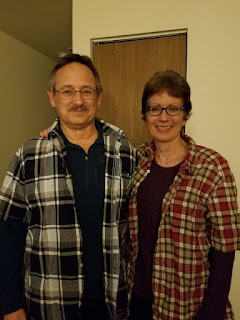
The
cubmaster uniform Ed wore at scout events for several years, including pack
meetings, pinewood derby races, marching in parades, and Blue and Gold banquets
where he would lead the meeting and the songs. He enjoyed leading the scouts, perhaps
foreshadowing his time as a pastor.
I
had hand sewed many of the patches onto his cubmaster shirt. Turning the shirt
inside out easily revealed which ones I had sewn, versus the ones that were
applied by machine. This shirt enveloped his body for several years while we
lived in Iowa.
The
red and white numbered patches reflected his troop, the “Hawkeye Area Council,
Iowa” represented the state, and all boy scout shirts had the American flag and
the words in red “Boy Scouts of America”.
I
had Ed’s cubmaster shirt, his cub and boy scout shirts from when he was young,
and my son’s cub and boy scout shirts.
Scouting
shirts, for me, held almost the same high regard as military shirts. So,
when I gathered the scout shirts, I began to dream about the possibilities for
them.
I
found a variety of pillows and shadow boxes people had created when I searched
online for items to make from scout shirts. Some were sewn into a quilt, but in
my mind, there were too many buttons and patches to get caught on things when
someone used a quilt.
My
thoughts kept returning to the teddy bear my sister made from my husband’s
shirt. It was sewn from a plaid shirt made with posable arms and legs. The bear included a tie, and Ed’s name,
birthdate and death date were written in fabric paint on the feet. I loved it.
I
researched free teddy bear patterns and was not happy what I found. I searched
patterns to purchase, specifically trying to match to the style bear my sister
made (because I asked her for her pattern, and she couldn’t find it!). I liked the
bear sitting on my desk, so I preferred a pattern with movable arms and legs.

After weeks of looking at patterns I found the “Signature Bear” from Funky Friends. It seemed to be simplest, but also included posable arms and legs.
When
I downloaded the pattern, I printed it and cut it out. I laid the pattern on my
husband’s shirt and was dismayed to discover that the pattern was so small,
that only a fraction of his pockets and patches would be included.
In
the vision in my head of this teddy bear, I wanted several representative
patches on the bear. I wanted arm patches on the arm, pockets on the front, and
the epaulets on the
shoulders. The patches that reflected a year would be great additions to the
bear as well.
It
was disappointing to think my bear would not hold all these things, and I
wondered whether I ordered the wrong pattern. Or if perhaps a teddy bear wasn’t
the right memory creation. Frustrated and unsure of how to proceed, I let the
project sit.
One
day while talking it through with a friend, he suggested I enlarge the pattern.
It
was as if the proverbial light bulb flashed! Of course! It was a pdf pattern I
downloaded, so I quickly brought it up and increased the print size. I printed
the chest pieces a couple of times before I found the perfect percentage that allowed
me to include the aspects of the shirt I wanted! I was excited to start work on
it!
However,
it was still incredibly sad to be cutting through the uniform, but I knew I
wanted to do something special with that shirt. A memory teddy bear felt like a
great way to remember Ed and his time in scouting.
I
needed an accent color fabric for the bottom of the feet and the ears of the
bear. Since several things on the uniform included red--the most notable being
the “Boy Scouts of America” in a red on all the boy scout shirts, I picked red.
The
instructions started with the head. The whole “crown” piece, or “gusset” seemed
very confusing. I couldn’t picture it. The Funky Friends, where I bought the
pattern, had a video to help with making your bear. This proved instrumental, as
it allowed me to watch, and rewatch, the portion on sewing the head.
The
rest of the bear was pretty simple after the head, with the hardest part being strategically
cutting the pieces so pockets and patches landed where I wanted them.
The
last stitch was hand sewing the hole used for stuffing the bear. It was tricky
to sew the stuffed bear closed while trying to keep the stitches invisible. I
did not do a very good job.
I
researched dog neckerchiefs and made a little neckerchief for the bear. I added
a couple of patches on it, so they decorated the back of the bear. (And
subsequently, covered up my less than desirable closing stitch!)
One
front, shirt pocket held his scout membership card. I kept that handy, and when
the teddy bear was finished, I put it back in the pocket I had cut
strategically to land on the front chest of the bear.
I
gifted that Scout Memory Teddy Bear to Ed’s parents.
I
still had Ed’s vintage, olive green boy scout shirt, and my son’s old, khaki, boy
scout shirt. After struggling, somewhat, with making the first teddy bear, I
was hesitant to attempt two more. I envisioned something that would highlight
the two shirts together.
Researching
online once again, I found a button-down shirt pillow that I really liked how
it included the collar. While trying to decide which shirt to try first, I wondered
about using both shirts, as a transition from one generation to the next.

I envisioned cutting the shirts in half and sewing half of each one together. I loved the idea that it would leave me with the option to make another one with the other two halves!
Boy Scout shirts over the decades have remained very
similar, but not exactly. The collar was a little different, the placement of
buttons, and the length of the shirt. However, the slight variation did not
matter.
Also, I had two neckerchiefs from my son’s time in scouts.
One from his time as a cub scout, and one from his time as a webelos (we be
loyal scouts). The shirt instructions I was following included the backside of
the shirt on the back of the pillow, but I wanted to include the neckerchiefs. I
angled them in each corner and sewed them together. Then I cut the shirts short
and sewed the neckerchiefs on the back instead.
If you can envision it, I had the two shirts in front,
and the two neckerchiefs in the back. The end result was wonderful, and I kept this
memory creation for myself.
However, later I took the other two scout shirt halves
and made a second scout memory pillow for Ed’s parents. I included patches that
had dates to reflect the years of each shirt half.
On Ed’s parents’ pillow I practiced my hand embroidery skills and embroidered “Ed III” and “Ed IV” on each respective owner’s shirt pocket. The goal was to make this scout memory pillow as memorable as possible, and I believe I succeeded!

I knew when I started these projects that there was the
potential for ruining the shirts and not creating anything worth keeping. But
not attempting to create something meant I would continue to carry around
shirts that were boxed up--unseen and unappreciated.
Now the shirts are displayed as conversation starters
with guests or as memory catalysts. They are something to be appreciated and handed
down through the generations.
And that is exactly what I set out to do.
Kim Taylor is an author and blogger living in Champaign,
Illinois. Her recent book, "Boxed In: One Widow's Journey" is
available in paperback and ebook on Amazon at https://www.amazon.com/Boxed-Widows-Journey-Kim-Taylor/dp/B0GS6YWRHN


Comments
Post a Comment